Tuesday, December 28, 2010

Dealing with Silverlight ChartPart

you need to add the following assembly references first!
xmlns:charting="clr-namespace:System.Windows.Controls.DataVisualization.Charting;assembly=System.Windows.Controls.DataVisualization.Toolkit"

xmlns:DV="clr-namespace:System.Windows.Controls.DataVisualization;assembly=System.Windows.Controls.DataVisualization.Toolkit"
xmlns:dataprimitives="clr-namespace:System.Windows.Controls.Primitives;assembly=System.Windows.Controls.Data">

XAML
//Add chart control in stack panel.
charting:Chart x:Name="SubscribeReportChart" Width="362" Height="338" >

charting:Chart.LegendStyle>
Style TargetType="Control">
Setter Property="Width" Value="0"/>
Setter Property="Height" Value="0"/>
/Style>
/charting:Chart.LegendStyle>

/charting:Chart>

XAML.cs

//Global declaration
ObservableCollection gChartDataCollection;
BackgroundWorker bwViewChart = new BackgroundWorker();
//MainPage
bwViewChart.DoWork += new DoWorkEventHandler(bwViewChart_DoWork);
bwViewChart.RunWorkerCompleted += new RunWorkerCompletedEventHandler(bwViewChart_RunWorkerCompleted);

void bwViewChart_RunWorkerCompleted(object sender, RunWorkerCompletedEventArgs e)
{
if (gChartDataCollection.Count > 0)
{
lblNoRecordSubscription.Content = "";
List(open angular)KeyValuePair(open angular)string, int>> chartDataList = new List(open angular)KeyValuePair(open angular)string, int>>();
foreach (var month in gChartDataCollection)
{
chartDataList.Add(new KeyValuePair(month.MonthName, month.Count));
}

ColumnSeries _mySeries = new ColumnSeries();
_mySeries.Title = "Subscriptions";

Style DataPointStyle = new Style(typeof(ColumnDataPoint));
DataPointStyle.Setters.Add(new Setter(ColumnDataPoint.MaxWidthProperty, 35.0));
DataPointStyle.Setters.Add(new Setter(ColumnDataPoint.BackgroundProperty, new SolidColorBrush(Color.FromArgb(255, 179, 199, 224))));
_mySeries.DataPointStyle = DataPointStyle;

_mySeries.IndependentValueBinding = new System.Windows.Data.Binding("Key");
_mySeries.DependentValueBinding = new System.Windows.Data.Binding("Value");
_mySeries.ItemsSource = chartDataList;

SubscribeReportChart.Series.Add(_mySeries);
}

void bwViewChart_DoWork(object sender, DoWorkEventArgs e)
{
ObservableCollection _suscribedChannels = new ObservableCollection();

foreach (ListItem _item in Channels.GetSubscribedChannelsByDate(gChannelID, gFromDateChart, gToDateChart))
{
SubscribeChannel page = new SubscribeChannel();
page.Month = Convert.ToDateTime(_item["Modified"]).Month;//int
_suscribedChannels.Add(page);
}

gChartDataCollection = new ObservableCollection();

foreach (var month in _suscribedChannels.Select(i => i.Month).Distinct().OrderBy(i => i))
{
ChartData page = new ChartData();
DateTime dt=new DateTime(1,month,1);
page.MonthName = dt.ToString("MMM");
page.Count = _suscribedChannels.Where(ch => ch.Month == month).Count();
gChartDataCollection.Add(page);
}
}

public class SubscribeChannel
{
public int Month { get; set; }
}
public class ChartData
{
public string MonthName { get; set; }
public int Count { get; set; }
}

Monday, December 27, 2010

Silverlight Grid

//Adding datepicker,label,button and grid to the Root grid on XAML.


Grid x:Name="LayoutRoot" Background="White" Height="476" Width="698"


Grid.ColumnDefinitions> //Grid columns
ColumnDefinition Width="198" />
ColumnDefinition Width="212" />
ColumnDefinition Width="199">
ColumnDefinition Width="66*" />
Grid.ColumnDefinitions>
Grid.RowDefinitions> //Grid Rows
RowDefinition Height="32">
RowDefinition Height="36">
RowDefinition Height="150">
RowDefinition Height="15">
RowDefinition Height="39" />
RowDefinition Height="28" />
RowDefinition Height="176*" />
Grid.RowDefinitions

sdk:DatePicker Height="23" HorizontalAlignment="Left" Name="FromDatePicker" VerticalAlignment="Top" Width="120" Grid.Row="1" Margin="78,8,0,0" />
sdk:DatePicker Height="23" HorizontalAlignment="Left" Name="ToDatePicker" VerticalAlignment="Top" Width="120" Grid.Column="1" Grid.Row="1" Margin="77,8,0,0" />
Button Content="View" Height="23" HorizontalAlignment="Left" Name="btnView" VerticalAlignment="Top" Width="75" Grid.Column="2" Grid.Row="1" Margin="50,6,0,0" Click="btnView_Click" />
sdk:DataGrid AutoGenerateColumns="False" Grid.ColumnSpan="3" Grid.Row="2" Height="138" HorizontalAlignment="Center" Name="dgrVisitedContents" VerticalAlignment="Top" Width="555" Margin="33,1,21,0" Grid.RowSpan="2" IsReadOnly="True">
sdk:DataGrid.Columns>

sdk:DataGridTextColumn Binding="{Binding ChannelName}" Header="Channel Name" Width="200"> // binding public proprties of the public class
sdk:DataGridTextColumn Binding="{Binding ContentName}" Header="Content Name" Width="200"/>
sdk:DataGridTextColumn Binding="{Binding LastVisitedDate}" Header="Last Visited Date" Width="200" />


sdk:DataGrid.Columns>
/sdk:DataGrid>


sdk:Label Height="28" HorizontalAlignment="Left" Margin="12,8,0,0" Name="lblLabelFrom" VerticalAlignment="Top" Width="61" Content="From Date" Grid.Row="1" />
sdk:Label Grid.Column="1" Height="21" HorizontalAlignment="Left" Margin="9,10,0,0" Name="lblTo" VerticalAlignment="Top" Width="62" Content="To Date" Grid.Row="1" />
StackPanel Name="StackPanelHeader" Grid.ColumnSpan="2" HorizontalAlignment="Center" VerticalAlignment="Center" Margin="183,-2,0,48" Grid.RowSpan="2">
Border Background="AliceBlue" Grid.ColumnSpan="4" Height="31" HorizontalAlignment="Left" VerticalAlignment="Top" Width="610">
dataInput:Label Height="25" HorizontalAlignment="Left" Name="lblHeader" VerticalAlignment="Center" Width="140" FontWeight="Normal" Content="Visited Contents" FontSize="16" HorizontalContentAlignment="Left" Grid.ColumnSpan="2" Margin="12,5,0,0" />
/Border>

XAML.cs

ObservableCollection gHits = new ObservableCollection(), hitspersonalise;
private BackgroundWorker bw = new BackgroundWorker();//Global

bw.DoWork += new DoWorkEventHandler(bw_DoWork);//MainPage
bw.RunWorkerCompleted += new RunWorkerCompletedEventHandler(bw_RunWorkerCompleted);
if (bw.IsBusy != true)
{
bw.RunWorkerAsync();
}

void bw_RunWorkerCompleted(object sender, RunWorkerCompletedEventArgs e)
{
dgrVisitedContents.ItemsSource = hitspersonalise;
}
private void bw_DoWork(object sender, DoWorkEventArgs e)
{
//your code here to fire query and bind ListItemCollections using foreach to observation collection
hitspersonalise.Add(new HitsInfo()
{
ChannelName = Convert.ToString(_channelNameItem["ChannelName"]),
ContentName = Convert.ToString(_contentNameItem["ContentName"]),
LastVisitedDate = Convert.ToDateTime(item["Date"]).ToString("M/dd/yyyy"),

});

}

public class HitsInfo
{
#region public properties
public string ChannelName { get; set; }
public string ContentName { get; set; }
public string LastVisitedDate { get; set; }
#endregion
}

Thursday, July 1, 2010

Server error: http://go.microsoft.com/fwlink?LinkID=96177

While trying to install WSS 3.0 SP1(http://technet.microsoft.com/en-us/office/sharepointserver/bb735839.aspx) the installation get stuck at task 9 of 10 of SharePoint Products and Technology Configuration Wizard. When tried to access the server, encountered the following error:

Server error: http://go.microsoft.com/fwlink?LinkID=96177

When look into the “Event Viewer”, found the following error description:

The schema version (3.0.149.0) of the database DATA
DATABASE_NAME on DATABA_SESERVER_NAME is not consistent with the expected database schema version (3.X.X.X) on DATABASE_NAME. Connections to this database from this server have been blocked to avoid data loss. Upgrade the web front end or the content database to ensure that these versions match.

Resolution:

The first thing we did was either remove content database from the web application which are having the error or Detach the database. This doesn’t seem to work. So we run the command

stsadm –o upgrade –inplace –url Central_Administration_URL –forceupgrade

and we were back in the business :)

Friday, June 4, 2010

Post back after data extract from sharepoint

This is the problem which many of sharepoint designer usualy can't solve,
once you click the “Export” button once, other controls will become unresponsive since WSS post-back will not work. You cannot export another copy neither. The following property assignment of the “Export” button is required for other post-back to work (including the “Export” button itself)

So you have to just provide a OnClientClick property of the button, See below..

oBtn_Export.OnClientClick = “_spFormOnSubmitCalled = false;_spSuppressFormOnSubmitWrapper=true;”;

Tuesday, May 18, 2010

Custom organization view in sharepoint

We can customize the famous Organization View web part (which is exists on My Site) on our site for our organization!! We can fetch all the related data through Sharepoint Pofile (which is sinks with Active Directory).
Below is the code,

#region Directives
using System;
using System.ComponentModel;
using System.Data;
using System.Configuration;
using System.Collections;
using System.Web;
using System.Web.Security;
using System.Web.UI;
using System.Web.UI.WebControls;
using System.Web.UI.WebControls.WebParts;
using System.Web.UI.HtmlControls;
using System.IO;
using Microsoft.SharePoint;
using Microsoft.SharePoint.Utilities;
using Microsoft.SharePoint.WebControls;
using Microsoft.SharePoint.Workflow;
using Microsoft.SharePoint.WorkflowUtil;
using Microsoft.SharePoint.Administration;
using Microsoft.Office.Server;
using Microsoft.SharePoint.Portal;
using Microsoft.Office.Server.UserProfiles;
#endregion

#region Organization
namespace Organization
{


public class OrganizationalView : System.Web.UI.Page
{

#region Global Variables

SPWeb oWeb = null;
protected SPGridView spGridView = null;
protected GridView grdOrganize = null;
protected HyperLink hprLnkManager = null;
public Label lblEmpName = null;
public Label lblManagerDesignation = null;
public Label lblEmpDesignation = null;
protected Label lblSelectedUser = null;
public Label lblEmpJobTitle = null;
public Label lblEmpEmail = null;
public Image imgdown = null;
public Image imgup = null;
# endregion

#region Methods

void GetUserInfo()
{
imgup.ImageUrl = oWeb.Url.ToString() + @"/_layouts/images/reportsup.gif";
imgdown.ImageUrl = oWeb.Url.ToString() + @"/_layouts/images/reportsdown.gif";
SPWebApplication spWebApp = null;
string sAccount = "";
try
{

if (Request.QueryString["ID"] != null)
{
sAccount = Request.QueryString["ID"].ToString();
}
else
{
sAccount = oWeb.CurrentUser.LoginName;
}
// Response.Write(sAccount);
SPSecurity.RunWithElevatedPrivileges(delegate()
{

spWebApp = oWeb.Site.WebApplication;
spWebApp.FormDigestSettings.Enabled = false;
ServerContext context = ServerContext.GetContext(oWeb.Site);
if (HttpContext.Current != null)
{
if (HttpContext.Current.Items["HttpHandlerSPWeb"] == null)
HttpContext.Current.Items["HttpHandlerSPWeb"] = oWeb;
if (HttpContext.Current.Items["Microsoft.Office.ServerContext"] == null)
HttpContext.Current.Items["Microsoft.Office.ServerContext"] = context;
}
UserProfileManager profileManager = new UserProfileManager(context);

UserProfile userProfile = profileManager.GetUserProfile(sAccount);

try
{
lblEmpName.Text = Convert.ToString(userProfile["PreferredName"]);
}
catch { }


try
{ lblEmpJobTitle.Text = Convert.ToString(userProfile["Title"]); }
catch { }
try
{ lblEmpEmail.Text = Convert.ToString(userProfile["WorkEmail"]); }
//txtEmpDivision.Text = Convert.ToString(userProfile["Department"]);
catch { }
/*
DataSet ds = userProfile.Colleagues.GetDataSet();

grdOrganize.DataSource = ds.Tables[0];
grdOrganize.DataBind();
*/
lblSelectedUser.Text = userProfile["PreferredName"].ToString();
try
{ lblEmpDesignation.Text = ", " + Convert.ToString(userProfile["Title"]); }
//txtEmpDivision.Text = Convert.ToString(userProfile["Department"]);
catch { }

DataRow dr = null;
try
{
UserProfile ManagerProfile = profileManager.GetUserProfile(userProfile["Manager"].ToString());
hprLnkManager.NavigateUrl = "OrganizationalView.aspx?ID=" + userProfile["Manager"].ToString();
hprLnkManager.Text = ManagerProfile["PreferredName"].ToString();
imgup.Visible = true;
try
{ lblManagerDesignation.Text = ", " + Convert.ToString(ManagerProfile["Title"]); }
//txtEmpDivision.Text = Convert.ToString(userProfile["Department"]);
catch { }
}
catch
{ }


UserProfile[] dsUF = userProfile.GetDirectReports();
DataTable dt = new DataTable();
dt.Columns.Add("PreferredName");
dt.Columns.Add("LoginName");
dt.Columns.Add("EmployeeDesignation");


if (dsUF.Length == 0)
{
lblSelectedUser.Text = "    " + userProfile["PreferredName"].ToString();
}
else
{
imgdown.Visible = true;
}

for (int i = 0; i < dsUF.Length; i++)
{
dr = dt.NewRow();


dr["LoginName"] = dsUF[i]["AccountName"].ToString();
try
{
dr["EmployeeDesignation"] = dsUF[i]["Title"].ToString();

}
catch
{
dr["EmployeeDesignation"] = "";

}
if (dr["EmployeeDesignation"].ToString() != "")
dr["PreferredName"] = dsUF[i]["PreferredName"].ToString() + ", ";
else
dr["PreferredName"] = dsUF[i]["PreferredName"].ToString();
dt.Rows.Add(dr);

}
grdOrganize.DataSource = dt;
grdOrganize.DataBind();

});

}
catch (Exception ex)
{
Response.Write(ex.Message);
}

}

#endregion

#region Events
protected void Page_Load(object sender, EventArgs e)
{
imgdown.Visible = false;
imgup.Visible = false;
GetUserInfo();
}
#endregion
}
}

#endregion


also i can give you the design code :)

Page MasterPageFile="~masterurl/default.master" Debug="true" Inherits="Organization.OrganizationalView, Organization, Version=1.0.0.0, Culture=neutral, PublicKeyToken=5b8788fec1ddaa1d"
meta:progid="SharePoint.WebPartPages.Document" Language="C#"
Register Assembly="Microsoft.SharePoint, Version=12.0.0.0, Culture=neutral, PublicKeyToken=71e9bce111e9429c"
Namespace="Microsoft.SharePoint.WebControls" TagPrefix="cc1"


asp:Content ID="Content1" ContentPlaceHolderID="PlaceHolderPageTitle" runat="server" Orgnaizational View
asp:Content
asp:Content ID="Content2" ContentPlaceHolderID="PlaceHolderMain" runat="server" table width="100%" border="0" align="center" cellpadding="0" cellspacing="0" bgcolor="#FFFFFF"
tr
td style="width: 100%;" colspan="4"
div
span font size="4" strong
asp:Label ID="lblEmpName" runat="server"
asp:Label strong font span
div
div
span font size="1"
asp:Label ID="lblEmpJobTitle" runat="server" asp:Label font span div
div
span font size="1"
asp:Label ID="lblEmpEmail" runat="server"
asp:Label font span div
td
tr
tr
td
br
td valign="top"
table
tr
td colspan="2"
font size="2" b Organization Hierarchy b font
hr
td
tr
tr
td colspan="2"
font size="2" b
asp:Image runat="server" ID="imgup" ImageUrl="layouts/images/reportsup.gif"
asp:HyperLink ID="hprLnkManager" runat="server"> b font asp:Label Font-Size="7" runat="server" ID="lblManagerDesignation" asp:Label td tr
tr
td bgcolor="#dee8ed" colspan="2"
font size="2" b
asp:Image runat="server" ID="imgdown" ImageUrl="layouts/images/reportsdown.gif"
asp:Label ID="lblSelectedUser" runat="server" Hierarchy Ends asp:Label b font
asp:Label Font-Size="7" runat="server" ID="lblEmpDesignation" asp:Label
td
tr

tr
td width="10px"    
td
td
font size="2"
asp:GridView ShowHeader="false" HeaderStyle-CssClass="ms-menutoolbar" RowStyle-CssClass="ms-cal-workitem2"
AutoGenerateColumns="False" HeaderStyle-HorizontalAlign="Left" ID="grdOrganize"
runat="server" CellPadding="3" BackColor="White" BorderColor="#999999"
GridLines="None" BorderStyle="None" BorderWidth="1px" Width="100%">
FooterStyle BackColor="#CCCCCC" ForeColor="Black"
PagerStyle BackColor="#999999" ForeColor="Black" HorizontalAlign="Center"
Columns
asp:HyperLinkField ItemStyle-Font-Size="10" HeaderText=" Organization Hierarchy" DataTextField="PreferredName"
DataNavigateUrlFields="LoginName" DataNavigateUrlFormatString="OrganizationalView.aspx?ID={0}"
asp:HyperLinkField
asp:TemplateField
ItemTemplate
asp:Label Font-Size="7" ID="lblEmpDesignation" text='<%# Eval("EmployeeDesignation") %>' runat="server" asp:Label
ItemTemplate
asp:TemplateField
Columns
asp:GridView
font
td
tr

table


td
tr
table
asp:Content
Friday, March 5, 2010

Create tabs on infopath form to switch views

Organize all the fields in a form: grouping each set of fields onto a "tab"
so the user can switch between the sets in whichever order they wish

The basic idea
Here's what to build:
Views for the contents of each tab
Table with shading to give the visual effect of tabs
Buttons for each tab with a rule that switches the view

The clever way to organize a view is described in detail in this article:
http://blogs.msdn.com/infopath/archive/2006/05/01/tabs.aspx

Also for the vertical tabs refer the following article:
http://www.infopathdev.com/blogs/mel_balsamo/archive/2009/09/06/create-an-infopath-form-that-switches-views.aspx

Tuesday, March 2, 2010

The Contact Selector Control in infopath

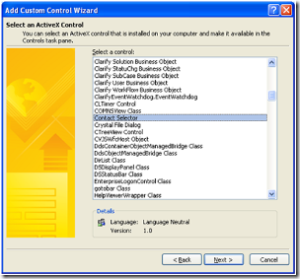
The Contact Selector control is an ActiveX control but it is a special cased control, in that it can also be used in InfoPath browser forms. To use this control there are specific steps that need to be taken – let’s take a look at those now.

Step 1: Add the Contact Selector control to your Controls Task Pane

1) From the Controls Task Pane click the Add or Remove Custom Controls link

2) Click the Add button

3) On the first screen of the Add Custom Control Wizard select ActiveX control and click Next

4) From the list of controls, choose Contact Selector and click Next


5) Select “Don’t include a .cab file” and click Next

6) For Binding Property select Value and click Next

7) From the Field or group type box choose Field or group (any data type) and click Finish
8) Click Close and then click OK

Step 2: Create the data structure for the Contact Selector Control

The Contact Selector control needs to have a specific data structure to work properly – this is documented on the “Items” tab of the Properties screen for the control; however, we’ll include that information here as well.

**IMPORTANT!** Spelling and capitalization must be exactly the same, starting with the “Person” group!

1) Add a non-Repeating Group named: gpContactSelector

2) Add a Repeating Group named: Person

3) Add the following 3 text fields to the Person group: DisplayName, AccountId and AccountType


Step 3: Add and bind the Contact Selector control to the View

1) Drag the gpContactSelector Group to the View and select “Contact Selector” from the list of controls
2) You’re almost done…! :-)

Step 4: Add a secondary data source XML file which specifies the SharePoint server

The Contact Selector control needs to know the “context” of where the user validation should occur. These steps are not necessary if you are only displaying the form in a browser from SharePoint – in this case, it uses the context of the site from where it was provisioned; however, if you are in a mixed client/browser scenario you will need to include this XML file so forms opened in the client can use this functionality.

1) Launch Notepad

2) Copy and paste this one-line XML:


**NOTE: Replace with the name of your server and also remove the comments

3) Save this as: Context.xml (again – naming and capitalization are important)

4) Add Context.xml as a “Receive” type Secondary Data Connection to your form template and make sure the option “Include the data as a resource file” is enabled

Step 5: Test!

You should now be able to Preview the form, enter a name or logon alias, click the “Check Names” button and resolve the name! Alternatively you could click the “To” button to perform a Search if you do not know the complete name of the user.

One other important point: if this control is something you will use numerous times, this process works great to create a “Contact Selector Template Part” – then you only have to complete these steps one time!


refered from this link.
href="http://blogs.msdn.com/infopath/archive/2007/02/28/using-the-contact-selector-control.aspx"

Custom web service code to find out whether a user belongs to perticular group

Add Following code in web service and publish this web service, it has two parameters that needs to be passed

1) employee login : should be in the form DomainName\username

2) Group name : which is group name you have created in sharepoint site.


Add web reference to http:///_vti_bin/usergroup.asmx.

Also put your server name where I have indicated below


[WebMethod]

public String IsMOSSUserGroup(String employeeUserName, String group)

{

try

{

ServerName.UserGroup objWebService = new ServerName.UserGroup();

objWebService.Credentials = System.Net.CredentialCache.DefaultCredentials;

System.Xml.XmlNode ndGroups = objWebService.GetGroupCollectionFromUser(employeeUserName);

Boolean blnFound = false;

String strGroup = group;

foreach (System.Xml.XmlNode xmlGroup in ndGroups.ChildNodes[0].ChildNodes)

{

if (strGroup == xmlGroup.Attributes["Name"].Value)

{

blnFound = true;

}

}

if (blnFound == true)

{

return "Yes";

}

else

{

return "No";

}

}

catch (Exception ex)

{

return ex.Message;

}

}

This web service will return Yes if the given user belongs to the given sharepoint group.

Auto increment number of repeating section infopath

If you have created the repeating section or table in your infopath form and want to index it with the auto increment number to the each row or section then here is the easiest way to do it without taking any coding efforts..

1. Open your infopath form.
2. Add an column named is Sr. No.in your repeating table/section.
3. Add a textbox control in the column.
4. Right click on textbox say Textbox Properties.
5. Simply add the following formula to the Default Value field,

count(../preceding-sibling::*[local-name() = "YourRepeatingGroupName"])

6. Replace "YourRepeatingGroupName" with your own repeating group name.
7. Say ok to all save and preview it!!
8. It will work like viola!!!!!!!!!!!!!!!!!

Sunday, January 17, 2010

Hide Default Close button from List Form Web Part and add custom button to go back.

Default "Close" button returns to the "Allitems.aspx" page of the perticular list. If you want to navigate to the different page,then you have to add the following javascript which is used to hide the default button also add the custom button to navigate to the back page.

Step 1: Hide the default Close button
for( var j=0 ; j<2 ;j++) //Since we are having two buttons on the form.
{
var btnClose = GetElementByType("input", "button")

//var btnClose = newitm.parentNode.parentNode.outerHTML;
if(btnClose != null)
{

btnClose.outerHTML = ""; //Hide the parent tag of the button i.e. outerHtml.
}
}
function GetElementByType(tagName, type)
{
var a = document.getElementsByTagName(tagName);

for (var i=0; i < a.length; i++)
{
if (a[i].type)
{
if (a[i].type== type)
{
return a[i];
}
}
}
return null;
}

Step 2: Add custom button and navigate it to the back page.

Add the following values in to div inside ContentPlaceHolder tag .
where,

INPUT TYPE="button"
VALUE="Go Back"
onClick="history.back()"

Hide toolbar from List Form Web Part

If you have added list from web part in display mode and you want to protect that item from edit,delete and so on..You have to remove the toolbar then. There are two options to do this,
1. Open your custom page containing Web Part in SharePoint designer and convert the code in to XSLT format. Then select the toolbar from design mode and remove it.
2. If you can not convert it to the XSLT format, use the following javascript. Write it inside the ContentPlceHolder tag.


var newitm = GetElementByText("a", "New Item") // find out "New Item" link first i.e 'a' tag.

var toolbar = newitm.parentNode.parentNode.parentNode.parentNode.parentNode.parentNode.parentNode.parentNode.outerHTML; // find out the "table" tag as its parent node and its outerHTML.
if(toolbar != null)
{
newitm.parentNode.parentNode.parentNode.parentNode.parentNode.parentNode.parentNode.parentNode.outerHTML = ""; //Assign that table to NULL so that it will be invisible to the user.
}

function GetElementByText(tagName, title)
{
var a = document.getElementsByTagName(tagName);

for (var i=0; i < a.length; i++)
{
if (a[i].title)
{
if (a[i].title == title )
{
return a[i];
}
}
}
return null;
}


Remember this is just a work around. Not a secured and perfect solution to use.